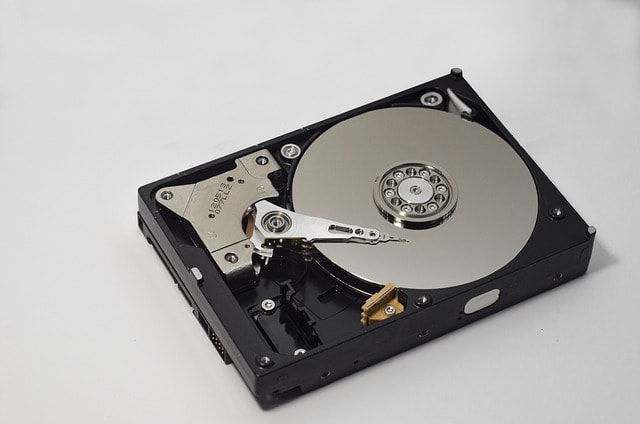
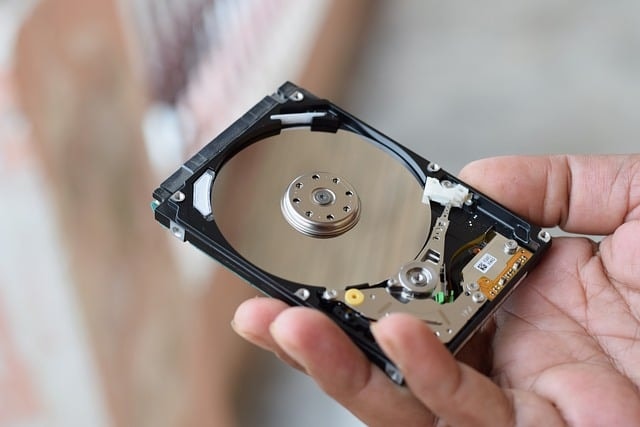
Need to know how to remove a hard drive from a laptop computer but not sure where to start? Understanding computer hardware is crucial for tasks like this. This straightforward guide provides steps for safe removal. If the hard drive is damaged or corrupted, you may need a professional data recovery service to retrieve your data.
At Blue-Pencil, we offer secure hard drive destruction. Before we can destroy your hard drive, it must be removed from your computer or laptop. Here are the instructions to do so.
Step-by-Step Instructions for Removing a Laptop Hard Drive
Here is a summary of steps to take in removing your hard drive. Keep reading for more in-depth results.
- Ensure the device is powered off.
- Disconnect all power sources to avoid electrical mishaps.
- Locate the main access panel, usually marked with a symbol.
- Use a screwdriver to remove the screws and open the panel.
- Release the hard drive from its mount.
- Carefully disconnect the hard drive from the connectors.
- Prepare the hard drive for secure destruction or storage by placing it in an anti-static bag.
Essential Preparations Before Removing Your Laptop’s Hard Drive
Before beginning, it’s essential to take specific steps to prevent data loss and avoid electrical hazards. These measures protect your data and ensure your safety during the hard drive removal.
Step 1: Back Up Your Data
Backing up your data is crucial before any hardware changes. To prevent this, transfer your files to an external drive, USB drive, or cloud service. This not only prevents data loss but also simplifies recovery if issues arise during hard drive removal.
Step 2: Disconnect Power Sources
Disconnecting power sources is crucial. Just as you wouldn’t repair a live electrical wire, you shouldn’t work on your laptop’s internal components while it’s powered on. Start by shutting down your laptop and removing the battery. This step is essential to avoid electrical damage during hard drive removal.
Also, disconnect the power cable and any USB or network cables connected to your laptop. This ensures no residual electricity flows through the laptop, preventing potential harm or damage. It is a simple yet vital step in safely removing the hard drive.
Step 3: Drain Remaining Electricity
With the laptop battery removed and cables unplugged, there’s one more step to ensure safety—draining any remaining electricity. Even with the main power sources disconnected, your laptop may still hold a residual charge. To eliminate this, press and hold the power button for about 15 seconds. This will discharge any lingering electricity, protecting both you and the laptop’s components.
Though it may seem minor, this step is essential for safety. Draining the remaining electricity helps avoid shocks and ensures the internal hardware isn’t exposed to electrical stress.
Locating and Accessing the Hard Drive
Having safeguarded your data and neutralized any electrical threats, the next step is to locate and access the hard drive from the laptop. Typically, it is situated on the bottom or side of the laptop, behind its access panel.
Using a precision screwdriver, remove the screws securing the panel to access the hard drive.
Step 4: Identify the Access Panel
The access panel provides entry to the laptop’s hard drive. Typically located on the bottom or side of the laptop, it is often marked with symbols, such as a stack of CDs, to indicate its position. This panel is designed for easy access, facilitating hard drive removal.
Step 5: Unscrew and Open
Having the access panel in view, the next step is to unscrew and open the hatch. Grab your screwdriver and gently remove the screws securing the panel. Depending on your laptop model, you’ll typically encounter two to four screws holding it in place.
Unscrew the access panel with care to avoid stripping screws or damaging the laptop. Remove the screws methodically and lift the panel to access the hard drive.
The Removal Process: Extracting the Hard Drive from Your Laptop
Removing the access panel prepares you to carefully remove the hard drive from the laptop. Follow these steps for a universal approach to hard drive removal, ensuring your data is ready for secure destruction with Blue-Pencil’s Hard Drive Destruction service.
Step 6: Release the Hard Drive Mount
Focus on the hard drive mount when removing it from the laptop. This cradle secures the hard drive within your laptop. Depending on the design, the mount may be held by screws or release latches. Use a screwdriver to remove screws or operate latches to free the hard drive.
Different laptop models may use various mechanisms to secure the hard drive. Understanding your laptop’s design is crucial. Once released, the hard drive is ready to be detached from its connectors.
Step 7: Detach the Drive from the Connectors
Once the mount is removed, gently disconnect the hard drive from its connectors. This step is crucial as the connectors transfer data between the hard drive and your laptop. Use a flat-bladed tool to carefully pry the hard drive away without damaging its components. Handle the connectors with care to avoid compromising the laptop’s functionality. Once detached, the hard drive is ready for the next steps.
Step 8: Prepare the Hard Drive for Destruction
Once the hard drive is removed, Blue-Pencil’s hard drive destruction service ensures that your information is not just deleted but permanently destroyed. Whether you opt for on-site destruction at your place of business or utilize the drop-off service at Blue-Pencil’s office, your data’s confidentiality is guaranteed.
Summary
From data backup to carefully detaching the hard drive, you are now equipped with the necessary skills to handle this task securely.While removing the hard drive is straightforward, the critical aspect is ensuring data protection. By using Blue-Pencil’s hard drive destruction service, you guarantee the complete and irreversible destruction of your data, ensuring privacy and security for yourself and your organization. This highlights the critical importance of data security in our current digital landscape.
Frequently Asked Questions
Do I need special tools to remove my laptop’s hard drive?
Yes, you will need a screwdriver, preferably a set of jeweler’s screwdrivers, for precision when unscrewing the access panel and hard drive mount.
How do I ensure that all my data is backed up before removing the hard drive?
To ensure all your data is backed up before removing the hard drive, transfer important files to an external drive or a cloud service. Consider using data recovery software or services to ensure no data is overlooked. If any files are missed during the backup process, you can use data recovery software to recover data from the hard drive.
What should I do with my laptop’s battery during the hard drive removal process?
To prevent electrical damage or safety risks, remove the laptop battery before the hard drive removal process. After removing the battery, hold the power button for 15 seconds to drain any remaining electricity.
How can I identify the access panel on my laptop?
Look for visual symbols like a stack of CDs on the bottom or side of your laptop to identify the access panel. This should help you locate it easily.
What options do I have for disposing of my old hard drive?
You can opt for hard drive destruction services offered by Blue-Pencil for secure disposal. They provide on-site destruction at your business or allow you to drop off the hard drives at their office.
When considering data recovery options, it’s important to compare different solutions, including other data recovery software, to ensure you choose the most effective one.


